Taking Product Photos With Your Phone? These Small Changes Can Make a Big Difference
If you've ever taken a photograph of your product and wondered why it doesn't quite look the way it does in real life, you may find this article useful!
As a photographer, I spend my days creating images for websites, marketing campaigns, online shops and social media. But I also know that most small businesses can't hire a photographer every time they want to share a behind-the-scenes moment, a new product, or a work-in-progress update.
That's where your phone comes in.
A smartphone will never fully replace professional photography, in my opinion. There is a huge difference between a quick image for social media and a carefully planned, styled and lit photograph created to represent your brand at its best.
But if you're using your phone to create everyday content, a few simple changes can make a surprising difference to the quality of your images.
These are some of the tips I share in my smartphone photography workshops for makers, artists and small businesses.
Start With the Basics
Before you take a single photograph:
✔ Clean your lens
✔ Turn on the camera grid
✔ Use natural window light
✔ Place a piece of white card opposite the window to bounce light back onto your product
✔ Switch off room lights
✔ Keep backgrounds simple and uncluttered
It sounds obvious, but these small details often make the biggest difference.
Choose the Right Lens
Most phones now offer several lens options.
For product photography:
✔ Use 1x as your standard lens
✔ Use 2x whenever possible
✘ Avoid the 0.5x wide-angle lens
✘ Avoid excessive digital zoom
The wide-angle lens can distort products, particularly handmade items, making them appear stretched or slightly misshapen.
If possible, step back and use the 2x lens instead.

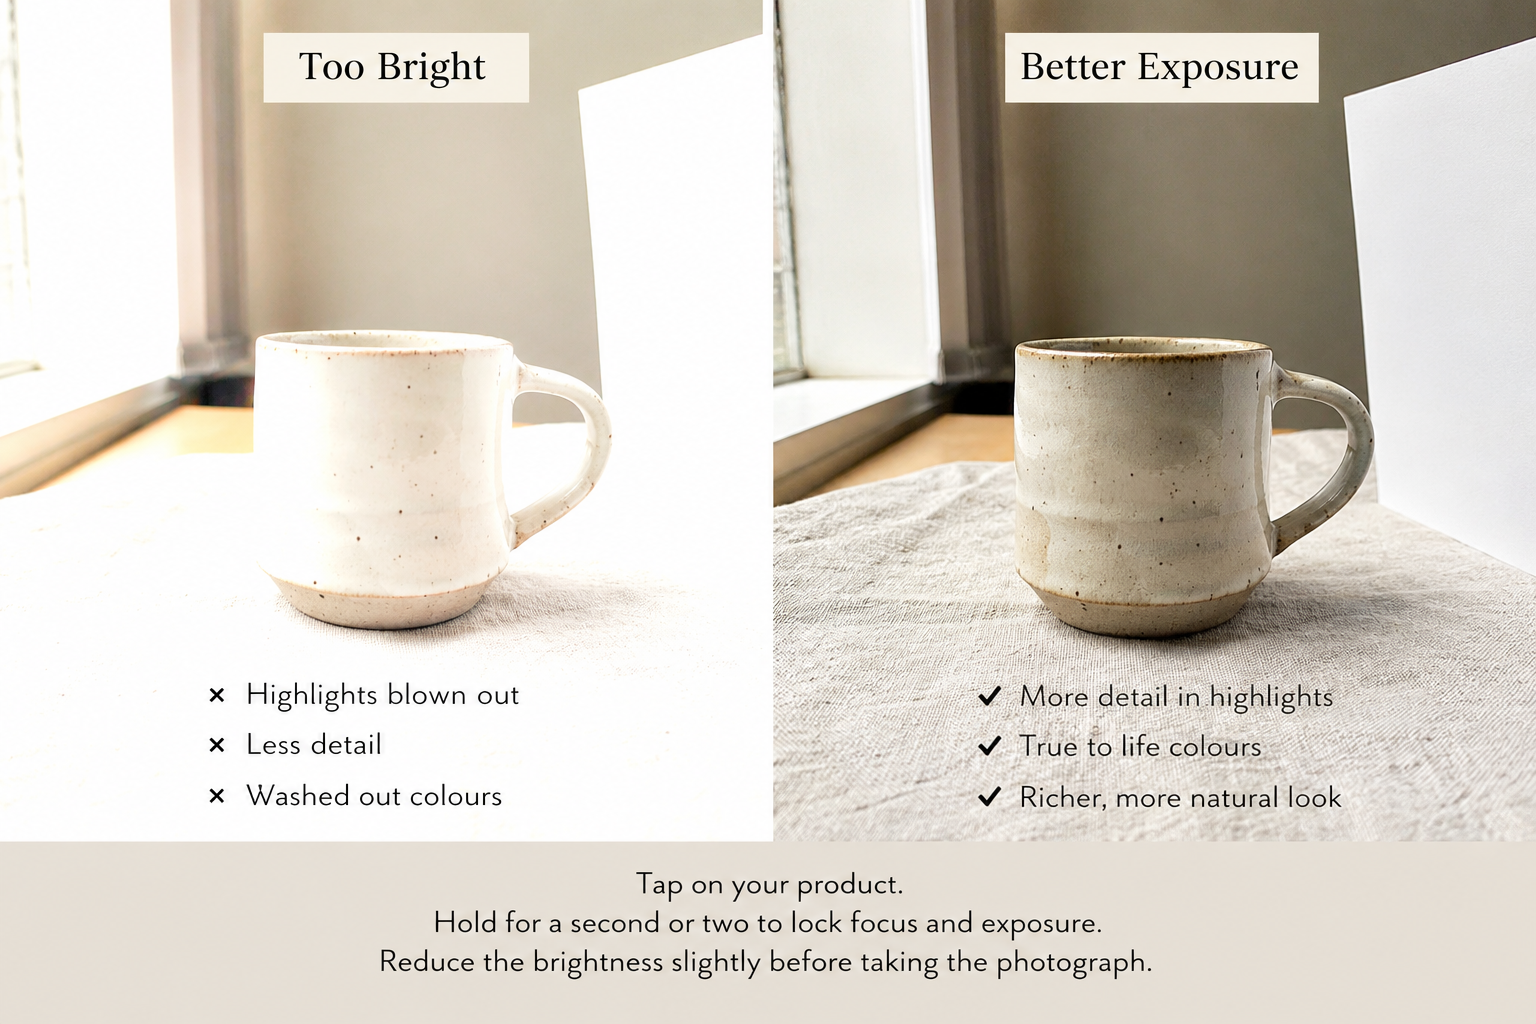
Your Phone Is Probably Making Things Too Bright
Phone cameras are designed to create bright, pleasing images automatically.
Unfortunately, that can sometimes make products look washed out.
Try this:
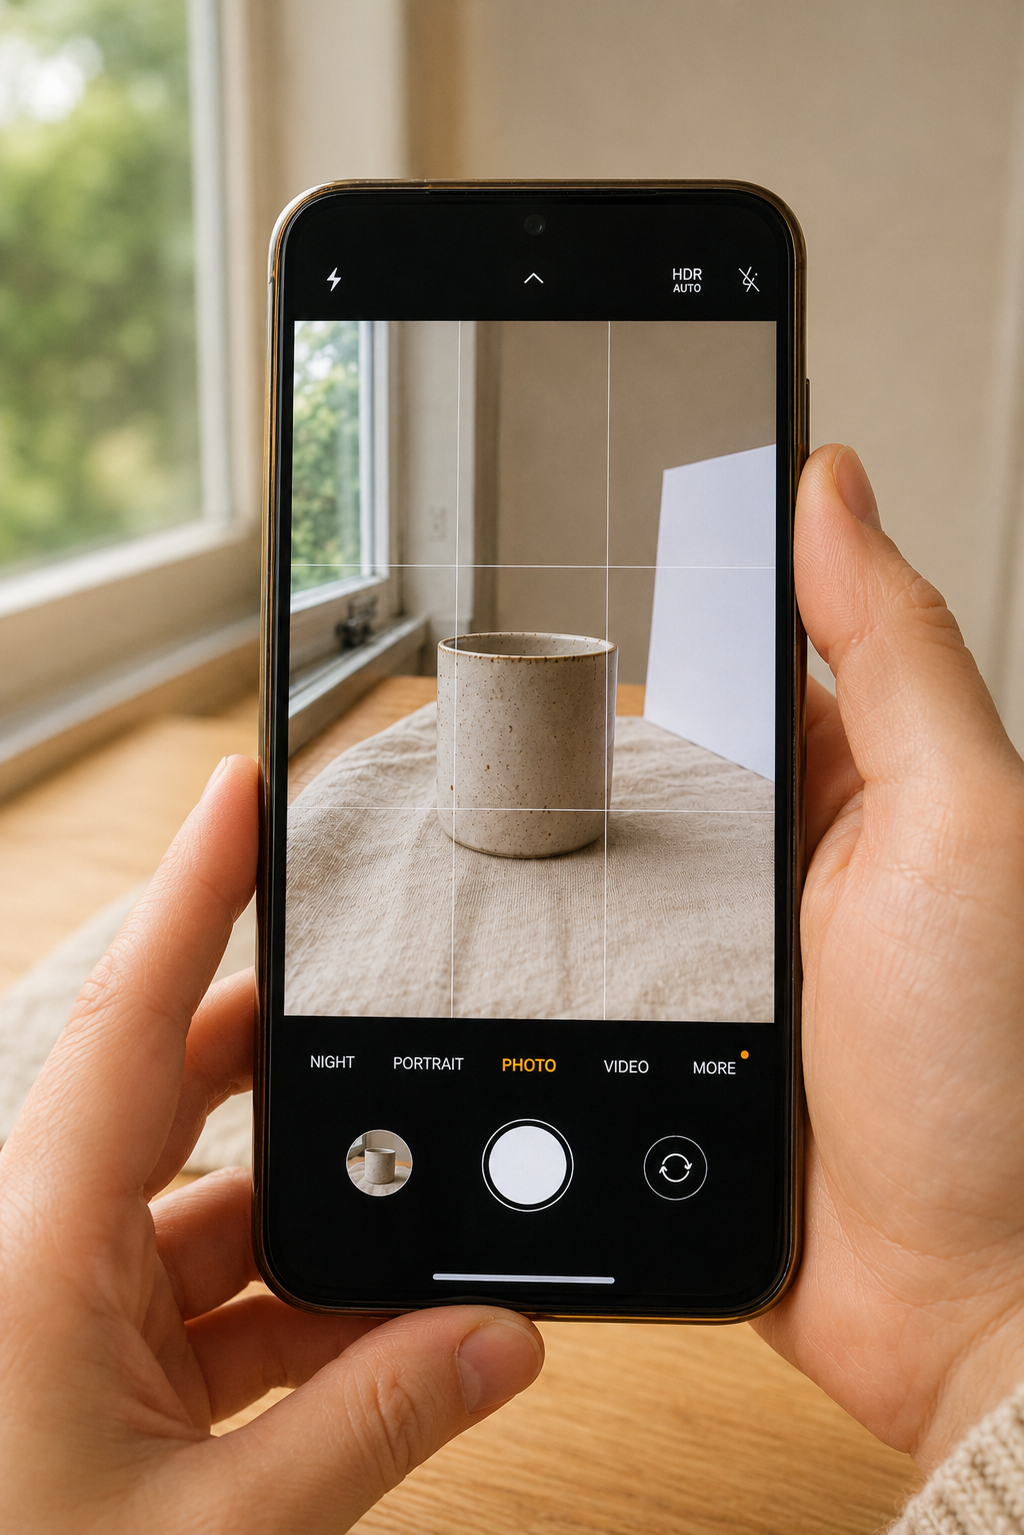
Tap on your product.
Hold for a second or two to lock focus and exposure.
Reduce the brightness slightly before taking the photograph.
You'll often retain more detail and create a richer-looking image.
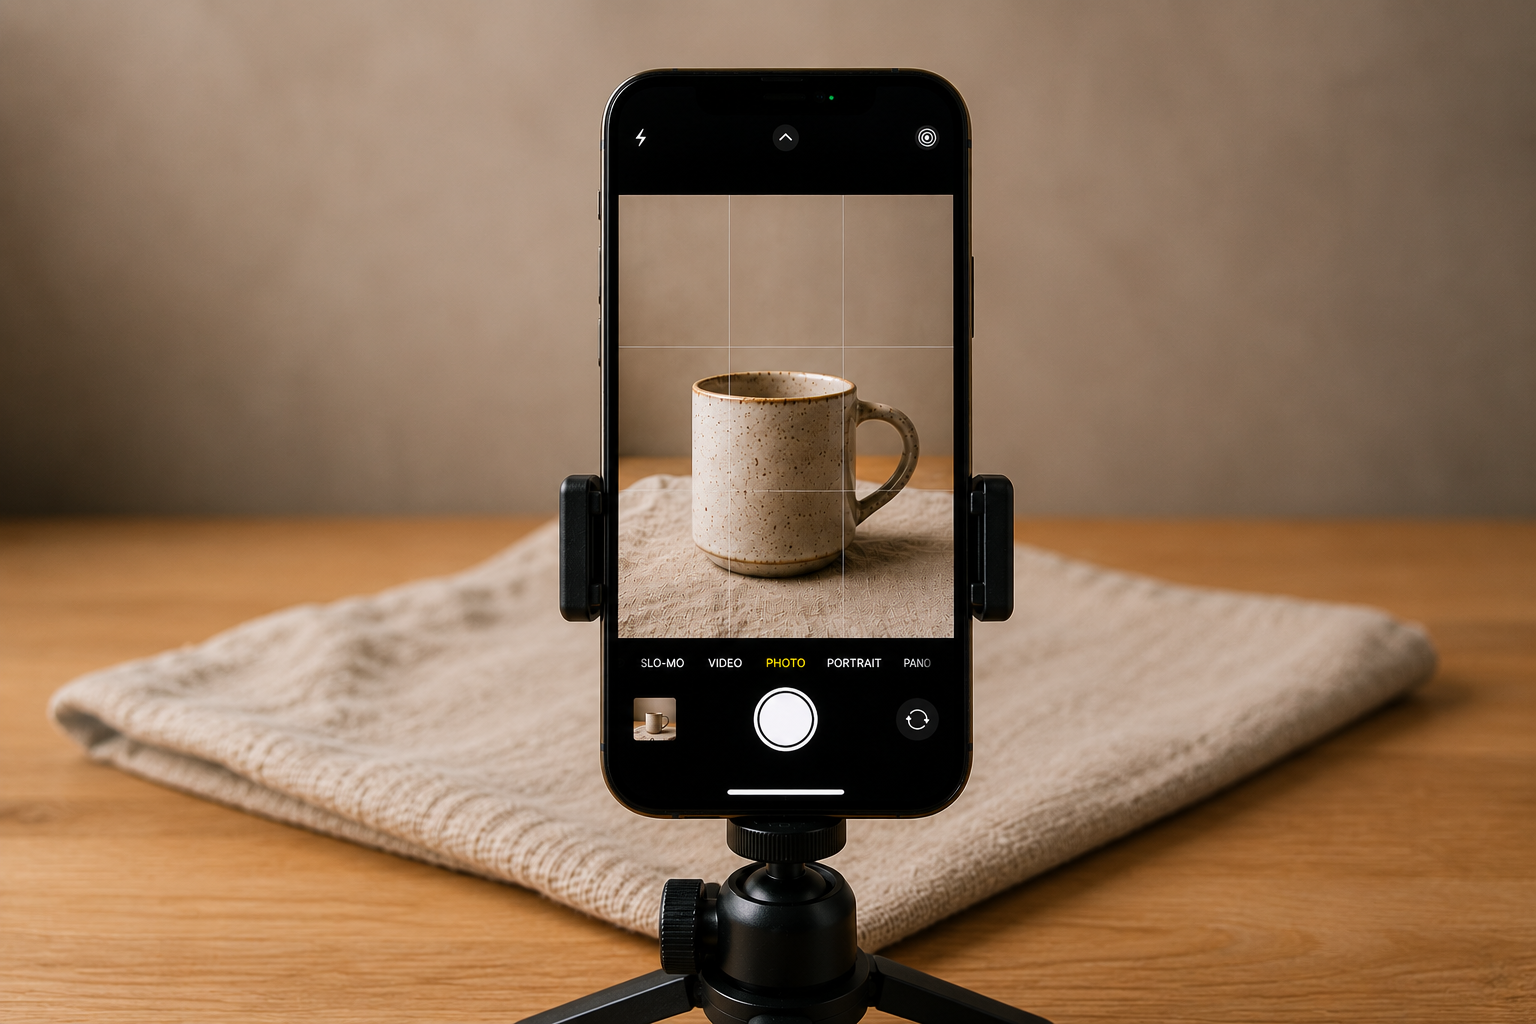
Use the Grid
If you only take one tip from this article, make it this one.
The camera grid helps you:
• Keep products centred
• Keep horizons level
• Photograph artwork straight
• Create more balanced compositions
• Apply the Rule of Thirds
Crooked horizons and tilted products are one of the quickest ways to make a photograph look amateur.
Try More Than One Angle
When photographing a product, don't stop after one image.
I usually recommend trying at least three viewpoints:
• Straight on
• 45 degrees
• Flat lay (directly overhead)
You may be surprised how different the same product can look from each angle.

Give Your Product Some Space
One of the most common mistakes I see is cropping too tightly.
Allow a little breathing room around your subject.
A bit of negative space often makes images feel cleaner, calmer and more professional.
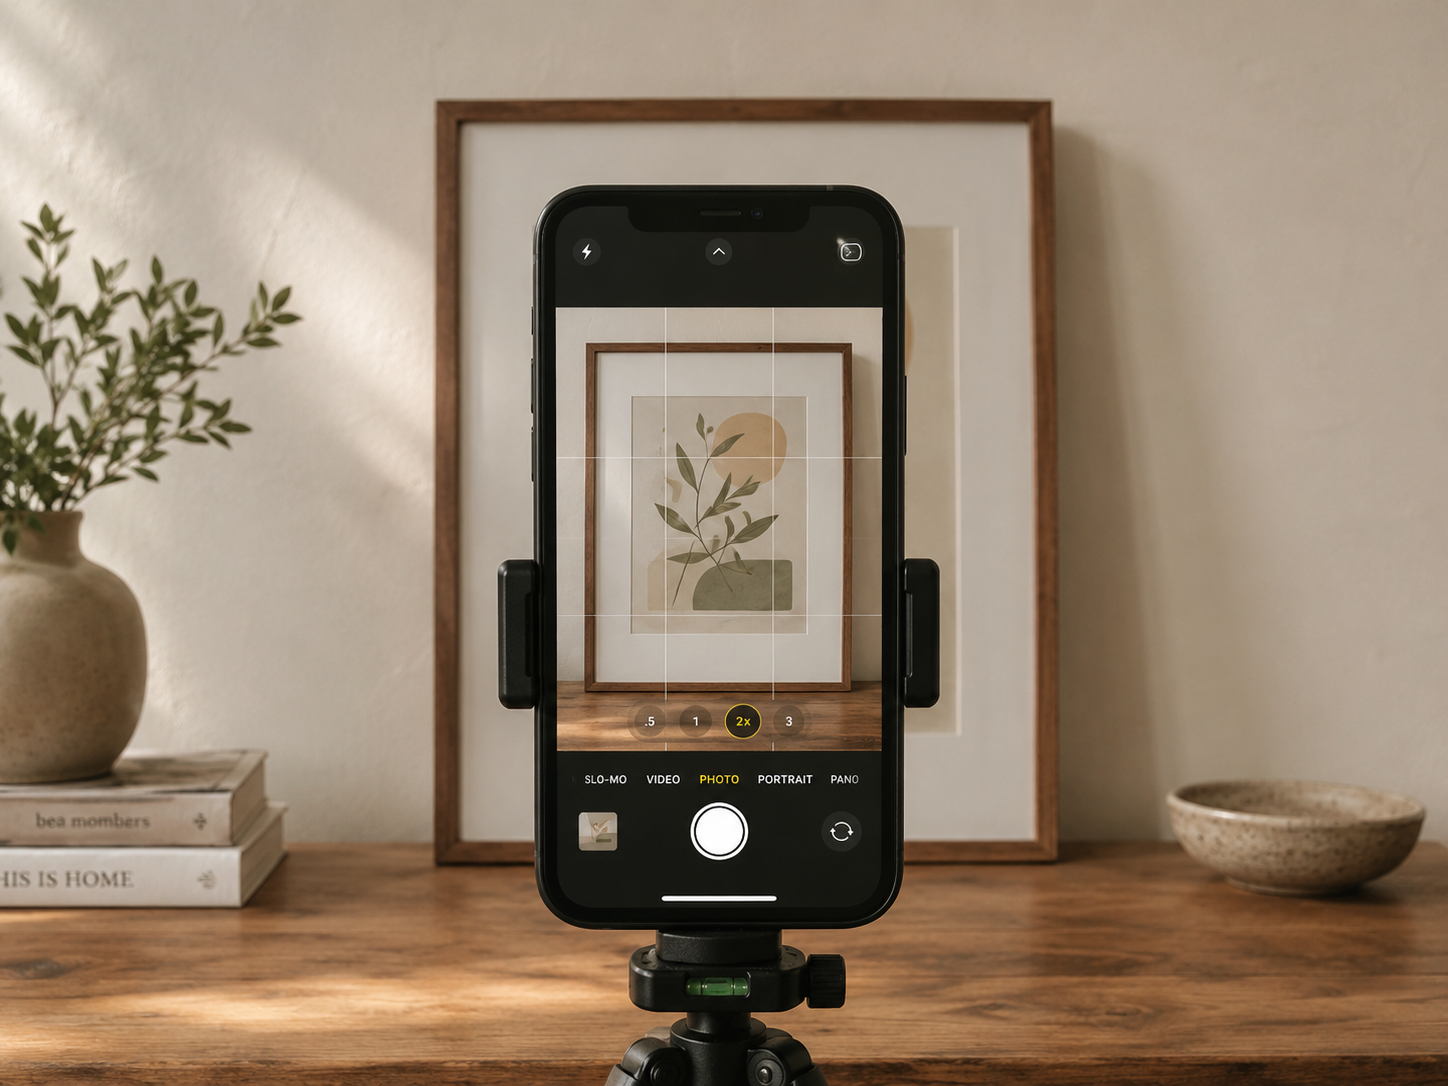
Photographing Framed Artwork
Artists often ask me how to photograph framed work without distortion.
The secret is keeping your phone perfectly parallel to the artwork.
Try this:
✔ Step back
✔ Use the 2x lens
✔ Keep the phone level
✔ Avoid tilting
A quick test:
The top and bottom edges of the frame should appear the same width.
If they don't, your camera isn't square to the artwork.
Dealing With Reflections
Glass can be frustrating.
A useful rule of thumb:
If you can see yourself in the glass, the camera can too.
Try:
• Moving slightly left or right
• Turning the artwork a few degrees
• Moving it closer to the window
• Switching off nearby lights
Sometimes a tiny adjustment is all that's needed.
A Simple Editing Workflow
You don't need complicated software for everyday photographs.
I often recommend Snapseed or Lightroom because they are free, easy to use and available on most phones.
My basic workflow is:
Crop distractions.
Straighten the image.
Adjust brightness if needed.
Reduce highlights.
Open shadows slightly.
Export and share.
Less is usually more.
If people can tell a heavy filter has been used, you've probably gone too far.
When Is It Time to Hire a Professional Photographer?
Your phone is brilliant for documenting your business as it happens.
Work in progress. New stock arriving. Behind-the-scenes moments. Updates for social media.
But there comes a point where professional photography becomes an investment rather than an expense.
If you're launching a new product, updating your website, applying for grants, approaching stockists, pitching to the media or building a stronger brand presence, the quality of your imagery matters.
Your photographs are often the first thing people see before they decide whether to click, enquire or buy.
Use your phone often.
Learn to use it well.
But don't underestimate the value of professional photography when the stakes are higher.
Both have their place, and knowing when to use each is part of building a strong visual brand.
A quick note about the images on this post:
The images in this post were AI-generated so I could create clear teaching examples quickly. They are here to illustrate the tips, not to represent real client work, real handmade products, or finished professional photography.